Wednesday, 3 December 2014

2014 batch 3: Bochet (3) - SNA scheme


My SNA scheme for the Bochet mead


Copy to "paint" and save as picture. This is easier to read than the scanned version but no hand written notes available. Hope it is readable.

I dare you to find calculation errors :o)


2014 batch 3: Bochet (2) - Fermentation start

Ingredients

Sweet Mead Wine Yeast (WLP 720)
144 g of spring honey
10.25 g of Fermaid K
18 g og MAP and 12 g of MAC
    (Corresponding to 10 g of DAP)
10 g of Potash (K2CO3)
and of cause the 19+ L of Bochet must :o)

Initially the yeast was taken out of the refrigerator so that it could warm up for minimum 3 hours before being used.

As you might have noticed I saved some of the honey used for the bochet. This was for an yeast activator to prepare for fermentation. The 144 g of honey was dissolved in 800 ml of boiled water and the solution was covered and cooled to room temperature in the refrigerator. When the yeast was ready, 0.25g og Fermaid K was added, and the beaker was placed om my magnetic stirrer. The yeast was then added, and the beaker was covered.

I set it up Friday night and planned spiking the starter/activator to the bochet must Saturday night. Friday was also the day I did the "burning" of the honey.

Again I will use a SNA scheme to spike the nutrients. Though, I changed the SNA to 4 days instead of 5 because my currant mead had fermented so fast that I did not get to add the fifth aliquot. (See HERE and HERE). Otherwise the setup was pretty much the same:

1) Initially high addition of Fermaid K and slow decrease
2) Initially low addition MAC/MAP and then increasing
3) Initially low addion of potash (base) and then increasing as CO2 levels (acid) go up 

In total I am adding:
281 ppm YAN
283 ppm Potassium
(See scheme in the next post)

Saturday night I did the standard measurements on the bochet must. It had an unpleasant thick dark foam covering the surface that has to be scraped aside to do the measurements:


Oe: 1.114 degree - bit low compared to expected 1.120 degreee
pH: 4.45 (no nutrients added) - bit low due to caramelization
Temp: 23C - super

Pink solution is the reference - pH 4.0. SNA aliquots in vial with blue lid. Beautiful color of the Bochet mead to the right :o)

All ready to go. I added the first aliquot of my SNA scheme, then the yeast activator and gave the fermentor a great big stir before sealing it.

I use the sieve to catch the stirrer magnet

When will I hear the first bubble in the airlock.......can't wait.

Tuesday, 2 December 2014

2014 batch 3: Bochet (1) - Burning the honey

For a long time I have been wanting to try to make a bochet mead. From the internet it seemed not the be the easiest. Also, various people claim that the used kitchen ware was not possible to clean. So I have been hesitating and reading a lot to kind of being prepared. As it turned out it was not so difficult.

Here we go....

For 20L Bochet:
7.4 kg honey (water content 15%)
Biggest pot I have (15 L)

I had put aside 7.4 kg of spring honey from this year for the purpose. Of this 7.25 kg (~5 L) was poured into my biggest pot which holds 15 L. I had read that the honey would expand a lot and that I needed a pot which were 4 times the volume of the honey. I figure 3 times would be enough. As it turned out this was a super critical bit of information!!!!

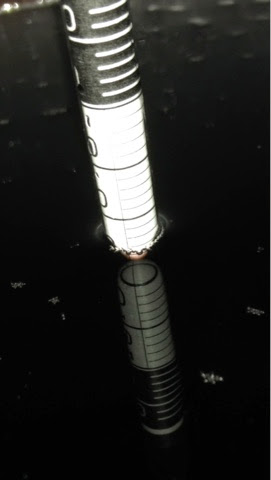
I had also read several statements about the temperature of the burnt honey, some extremely high. To shed some light on this I bought a thermometer which could measure up to 250C. I prepared a holder for the temperature probe which I made out of a cheap wire hanger (see pic below). And I was ready to go.


As the temperature was rising the first I noticed was a dramatic drop in viscosity shortly after I reached 40C. Also, the honey became very unclear.


At about 110C the honey started to foam. This was expected since the boiling temperature of water is 100C and the honey contains about 15% of water. When the temperature hit 115C, the mead started to foam like crazy, and the foam level kept rising almost to the top of the pot. Fortunately it did not overflow - It would have taken forever to clean the kitchen. I turned down the heat to slow down the foaming, still keeping the temperature at 115C.


Since water is evaporating the temperature will not change if the heat is turned up. Instead more water will evaporate at the same time and the foam would have increased. As the water evaporates the honey will heat up slowly but it will never reach excessive temperatures as long as the sugar is mixed with water.

Now here is the interesting thing. Shortly after the foaming started the honey also started to brown. This means than the honey is not being burnt but is actually boiled.

The temperature slowly went up to 125C (give and take 5C) and never got above 130C throughout the heating. During the entire boiling time I was stirring the pot to ensure that the honey did not stick to the bottom at any time - then 1½ hour is a looong time


From homebrewtalk (HERE) I found this great picture that is worth showing again. It is a picture by Sharkman20 (credit where credit is due).


With reference to familiar terms from the roasting of malt, I figured I will use the following definitions
30-60 min: Mild-mel
75-90 min: Cara-mel
105-up: Choco-mel
:o)

I am actually not all that fond of a strong burnt taste, so I decided to stop when I reached a cara-mel. Using the same set-up, I followed my progress. 

Times from the top left the time was: 45min, 60min, 70min, 85min, and just before cooling 90min

The smell and taste of caramel was really strong with a light bitter aftertaste. I think this mead will taste like nothing I ever tasted before.

For cooling I filled my kitchen sink with cold water and slowly lowered the pot into the water. Then I poured cold water into the honey bit by bit until I could no longer hear the hissing of evaporating water. The pot was then removed from the sink because the honey started to clod on the sides, but with a bit of stirring the cloding melted again. Then I just added cold water to about 10 L, checked the temperature (about 60C) and poured the content into a sanitized fermenter. I rinsed the pot twice with cold water which was then also added to the fermenter. Finally I filled the fermenter to somewhere above the 19 L mark, put the lid on and left it to cool down. And best of all. No burnt black honey and a pot that was very easy to clean.


So in conclusion: With a pot large enough to hold 3-4 times the volume of honey and with good temperature control of the stove, it is not difficult to "burn" honey for a bochet mead in a controlled manner.


Sunday, 23 November 2014

2014 batch 2: Currant mead (9) - Oaking using chips

I have been planning this for a while so now it is time to try. The use of Oak is praised on pretty much every page talking about oak and mead so I have to try it out too.

I purchased 250 g of American Oak chips which should give taste quickly, though less complex. Other options would be French or Eastern European oak. French should give a more complex Oak taste but should also be able to over power a mead quickly. Eastern European oak should release taste slower and the taste should be much less intense. With absolutely no experience with oaking mead I figured the American oak chips would be the best chips to start with :o).

Furthermore the oak can be toasted to several levels. The main types used are light toast, medium toast and heavy toast, each imparting different taste notes. Apparently medium toast is by far the most recommended to start with. so American oak chips - medium toast it is :o)

I have also been looking for a guide for dosing the oak. The best I could find was actually from where I bought the chips (Dansk Hjemmeproduktion). Here the recommendations are:

White wine: 50-150g / 100L
Red wine: 100-250 g / 100L
Extraction time: 4-12 weeks.

Again I figured I would start somewhere in the middle - something that would go for both red and white wine, i.e 125 g / 100 L or 25g / 20 L.

Just found another reference HERE from E.C.Kraus. This is by far the best web page I found so far regarding oaking. And as a bonus there is a bit about the history of oaking.

So here we go:

The chips I bought contains lots of little bits that will be able to go through the "hop bag" that I will use for the chips. The get rid of these I just used my spaghetti strainer with a plastic bag underneath.


In this way I lost about 45 g of the 250 g bag that I bought. But now, at least, most of the chips should stay in the hop bag. This is definitely one good reason to use oak cubes next time if available.


I weighed out 25 g in a hop bag, and tied the bag up at the opposite end, so that the chips would not be pressed together in a small space - more free and available surface, better extraction.


Then I boiled the bag shortly. The water quickly got colored, and I became unsure whether this was the taste components I wanted in my mead, so I just boiled for 10 sec or so. I am not so worried about contamination since the mead has finished fermenting with a high content of ethanol (14-15%). This should be too harsh for most wild yeast.

Also in the picture below I took a sample of the mead for tasting, so that I can compare "before" and "after" oaking.


Finally I drained the pot for water and left the hop bag in the pot to cool for a few minutes. Hereafter I just dropped the hop bag into the currant mead, and closed the lid.


Now I will just have to wait. I will test the the mead weekly to see how it develops.

I read that the chips will sink once they get fully soaked. Come to think of it, I should perhaps have tied a string to the bag which I could have attached to the edge of the fermenter. In this way I would not have to "spoon" the bag out later. Fingers crossed that it will not be that difficult and that the sediment will quickly settle again.

Thursday, 20 November 2014

2014 batch 2: Currant mead (8) - Check

After finishing up with the cyser I just did a check on the currant mead.


Oe: 26 (OK)
pH 3.45 (Uh, somewhat lower than I wanted)

The color is great - bright red - and not pink that I was initially afraid of since the amount of juice was quite limited. It has also cleared quite well already.

I need to lift pH a bit which I will do with potassium carbonate. I just need to test how much to add.

Finally I covered the mead with a layer of CO2 (See "CO2 generator" under Knowledge Tools), sealed the lid, and attached the airlock.

2014 batch 1: Cyser (7) - Back sweetening

Time to back sweeten the cyser. Opening the cyser it is almost clear and the milky smell is not pronounced in any way any more. The current Oechsle value is now 18. Last time I measured it, the values was 16 so I assume that the high level of dissolved CO2 interfered with the measurement. The taste is nice - like sherry -but it does need just a little bit more sweetness, so I decided to add honey to 25 degree Oe. Using the same scheme as for the currant mead I get:


My plan was initially to the honey that was left for this batch since I only used 4.8 kg of the 7.2 in stock. But I used it all for back sweetening my currant mead (first to lift the Oe after addition of juice and the rest for back sweetening). Instead I will use the late summer honey. It is quite fragrant compared to the summer initially used for this batch. Hopefully it will give more honey odor initially before the sherry like taste sets in. .... and mask any residual yogurt like smell from the malolactic fermentation.

The procedure is the same: 470 g of honey in a clean bowl. About 1.5 L of cyser, stir for quite a while (but not vigorously) to dissolve the honey and and pour the solution back into the fermenter. Rinse the bowl with another 1 L of cyser.  Then give the fermenter a quick stir and attach the lid and airlock

The next day I checked the mead after it had been settling:


Oe: 25
pH: 3.64 (a little low)

Almost Perfect :o)

Since it is not fermenting any more, I want to cover the mead with a layer of CO2 to avoid oxidation. For this I used my trusted CO2 generator. You can find directions for the generator in Knowledge Tools in top right corner of this blog.


Sunday, 16 November 2014

2014 batch 2: Currant mead (7) - Racking

When I did the back sweetening I noticed that a layer of solids up to the 5 L mark of the fermenter. When I poured in the currant juice there was plenty of solids in there (cellulose?) which I also observed shortly after juicing the berries. I figure the yeast would break these solids down during the fermentation. This did apparently not happen :o( Also, I did not see a the thick layer of yeast at the bottom even though the top liquid had cleared. I guess that the yeast adhered to the solids to make a fluffy bottom layer that just did not sink below the 5 L mark.

So, today I tried to rack the mead. First I racked the top layer the normal way and put this aside. Looking into the fermenter I got a bit discouraged, but decided to give it a shot.


First I put a large coffee filter in a sieve and tried to filter the mead through this. Did not work. The liquid stop dripping shortly after I filled the filter.

Next step was to use a diaper cloth, which I rinsed on boiling water to ensure that it was clean. I put it in the sieve without folding it, and filled the sieve again. This time the liquid came through, but after a short time, the flow through the cloth was also blocked.


In the end, and after a lot of patience, I stopped. I poured the 1 L I did salvage into the new fermenter too, and the total volume was now only about 20 L.

The last 4.5 L was then poured............ in the toilet. !"¤%&¤#"?.

Now here is another lesson learned: Rack first, back sweeten afterwards!!!!!! And to step in it a little more: 4.5 L, or about 20%, means that I wasted 20% of the honey I back sweetened with - around 350 g down the drain.