Friday 31 October 2014

pH meters - which one to buy

I have been looking at several blogs to see which pH meters were used by home brewers. It is a fantastic tool, but can also be quite expensive. Never the less I recommend that everyone with an interest in the details of how your wine, mead or beer develops to purchase a proper pH meter. But as always it is important to look around before you buy.

I came across 5 different brands with pH meters with products that could be used for home brewing. These were

Hanna Instruments
Milwaukee Instruments
Adwa Instruments
HM Digital and
Atago

Other brands are available on the web but as far as I know these are not available from danish suppliers. These are:
Omega (PHH-7011)
Hach (H series H160 or H170)
LaMotte (Tracer Pocket Tester)
.... (Let me know which ones I missed) ....


Hanna-, Milwaukee-, and Adwa- Instruments
Researching the web I made an interesting observation. Hanna, Milwaukee, and Adwa are very likely the same company. They all have office at EXACTLY the same address in Hungary. 
...Alsókiköto sor 11., H-6726 Szeged....
So if prices for these 3 brands are similar, it is not a surprise.  

It bothers me quite a bit that one company are giving the customer a sense of choice by producing different brand names but are in fact selling the same "crap in different wrapping".

So the choice was now down to HM Digital and Atago. 

HM digital
HM is a US company and their pH meters are produced in South Korea. They sell 2 different pH meters that are useful for home brewers:
pH 80 and
pH 200
The main difference is the resolution. pH 80 show results with one decimal and pH 200 with 2 decimals. 

Atago
Atago is a japaneese brand and sells only one pH meter - the DPH-2. This pH meter only has a resolution of 1 decimal. 

The Choice...
Hereafter it was quite easy for me to choose, and I purchased the pH 200 from HM Digital. As a bonus it was also cheaper than the "Hungarian Huddle" 


I will try it out for a while before reviewing it. As for now, it is fulfilling all expectations. 


Thursday 30 October 2014

2014 batch 2: Currant mead (3) - Fermentation progress

I have spend several days monitoring how the fermentation has progressed:

Monday the 27th of October
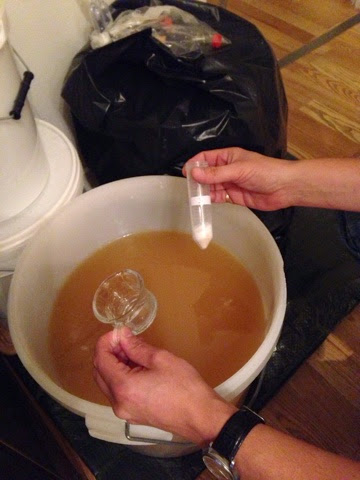
The following day I opened the fermenter and sampled for gravity and pH.

pH: 3.84
SG: 1.110
Temp: NA

Bugger, I forgot to measure temperature (?). Never the less it is interesting to see that pH had fallen from 4.7 to 3.8 due to the CO2 produced by the yeast. This is still in the start-up of the fermentation so yeast count is probably increasing. The resulting SG shows a decrease in gravity of 0.010.

Then I added the second nutrient pack:
Fermaid K: 2.0 g
MAP: 4.0 g
MAC: 3.0 g
K2CO3: 2.0g
Total: 64 ppm N and 57 ppm K+

I poured about 30 ml of must into the tube containing the nutrients, swirled it a bit to make a slurry and poured the content into the fermenter. To my surprise the must started to foam very aggressively, and I started to worry that I would be cleaning the floor for sticky honey. Fortunately, the foam stopped a bit before the edge. Then I stirred the must quickly to dissolve the nutrients, closed the fermenter and re-attached the airlock.

Evening Tuesday the 28th of October

pH: 3.64
SG: 1.088
Temp: 25.7 C (?)

So pH had droåped even further. Even though I add carbonate with both MAC and K2CO3 it might push pH a bit but it will fall again at least within one day. SG was surprisingly low. Gravity had fallen 0.022 in just one day - that is about 1/5 of the sugar available for fermentation, i.e. at this rate the fermentation could be over in just 5 days, WOW. Temperature was high, but I am not sure I trust the reading. The room was 23 C so the fermentation should have raised the temperature by almost 3 C - seems like a lot.


I then added the 3rd nutrient pack which was identical to the second one above. This time I did an effort to slowly dissolve some of the additives, pour it in, add more must to tube, dissolved a bit and pour it in, etc.
Never the less I still got a lot of foam.


Evening Wednesday the 29th of October

pH 3.63
SG 1.066
Temp: 24.1 C

It seams like pH has leveled out despite addition of carbonate so the must is probably now well buffered by bicarbonate. Once again SG had dropped 0.022 which I am still surprised about. Temperature is now within the expected range just a bit above room temperature - great

The 4th nutrient pack was added with was also identical to the second. Even though I planned for 5 nutrient packs I will not be adding the 5th. Since OG was 1.120 and I expect a FG to be 1.013 for an ABV of 15 % or a drop of 0.107 then an SG of 1.066 corresponds to 50% of the fermentation progress. Most articles says that you should not add nutrients past this point, so I will stop here and see what happens.
_________________

The 5th nutrient was a bit smaller than the previous packs

Ferment K: 1.0g
MAP: 4.0 g
MAC: 3.0 g
K2CO3: 2.0 g
Total: 57 ppm N and 57 ppm K+

My plan was to add 300 ppm N and 255 ppm K+. As it turned out I will have added only about 240 ppm N and 200 ppm K+.

In the coming days i will continue to monitor SG and pH. If the rate continues the fermentation should finished by Saturday - that would be a new record for me :o). And I will use this SNA scheme with 4 additions in the future.


2014 batch 2: Currant mead (2) - Fermentation start

Recipe:

7200 g of Summer honey, 2014
140 g of Spring honey, 2014
5 Nutrient packs according to SNA scheme
Water to 20 L
3.5 L of currant juice

Starter:
As always I am aiming at a starting gravity of 1.120 which is so high that it could become difficult for the yeast to really get started - So just in case I initiated the fermentation with a starter at a little less than half the gravity.

I dissolved 140 g of "spring honey" in 800 ml warm water, covered the glass and let it cool to room temperature. 

pH: 5.98
SG: 1.058

Just before adding the yeast I whipped the solution with with a kitchen mixer to get as much air into the solution as possible. Then I added the yeast which again was White labs, Sweet Mead, WLP715, covered the opening of the glass and placed it on my home made magnetic stirrer. The solution was stirred once in a while to ensure good mixing. 

The starter was up and running Saturtday the 25th of October at noon

Mead fermentation:
In the evening of the 25th of I prepared the must.

All the honey (7.2 kg) was poured into a fermentor. I just left the honey container up-side down for a while to get as much honey out as possible. Then I heated 10 L of water to 70oC and poured in into the fermenter too. Some of the water was used to rinse the honey container to ensure that I got it all out. I started to stirr to dissolve the honey. When no more honey was sticking to the bottom of the fermentor I added about 5 L of cold tap water so that the total volume was just below 20 L and stirred the solution well again. Then I left it overnight to cool down. Following this procedure the solution was 40 C when I finished.

Sunday the 26th of October:
During the day I was checking the starter. It was quite clear that the fermentation was running. When not stirring I could see plenty of small bubbles making the surface almost vibrate.

In the evening I added Nutrition pack 1 to the mead:
Fermaid K: 3.0 g
MAP: 3.0 g
MAC: 1.0 g
K2CO3: 1.0g
Total: 47 ppm N and 28 ppm K+


I left the solution for a couple of hours and measured

pH: 4.66
OG 1.120
Temp: 23.0 C

Notice that just honey and water gives pH around 6 whereas pH is 4.7 when nutrients are added. This means that the buffer capacity of the honey is almost non-existent. OG was on the target :o)


The starter was added and the beaker was rinsed with about 2 dl of water. So the total volume was just above 20 L. Finally the lid was closed and the airlock was filled with water and placed securely in the lid. Time to wait for the first bubbles from the airlock


Monday 27 October 2014

2014 batch 2: Currant mead - SNA scheme (JPEG)

I could not figure out how to attach a file to the blog, so I just scanned the SNA scheme that I prepared.

It look like this:

For some reason, the last line of the page is not scanned - that is what you get when you buy a cheap printer/scanner. 

Everything is calculated once you entered the weighed amounts. The scheme is set up for additions over 5 days but will be adjusted according to how this mead behaves. 

Sunday 26 October 2014

2014 batch 2: Currant mead - SNA preparations

This time I will try to make a currant mead using the current juice I prepared this summer and have been storing in the freezer since (ref. HERE).

Secondly, I will try to keep the fermentation strong until the max ABV is reached by Staggered Nutrition Addition.

Basically there is not much else but glucose and fructose in the must. This means that if nutrients need to be added to avoid a sluggish fermentation. As far as I can find on the internet I need:
300 ppm of FAN/YAN
300 ppm of potassium.
and yeast nutrients in general.

For this I used Fermaid K and since I still have not been able to get DAP, I am using a mixture of monoammonium dihydrogen phosphate (or MAP) and monoammonium bicarbonate (MAC). MAC can also be purchased as the baking spice "Hartshorn" but be sure whether you purchase ammonium carbonate or ammonium bicarbonate. It appears that both are sold under the same name. Furthermore, DAP or MAC/MAP should not be added in high concentrations as it then becomes toxic to the yeast. The idea is to spread out the additions over several days and keep the concentrations at a consistent level for the major part of the fermentation.

As potassium source I used pot ash or potassium carbonate. This is also a quite basic compound so I decided to add it in a staggered fashion too so pH is not to high in the beginning and use it to raise pH a bit during the fermentation so that CO2 does not push pH too low. I cannot measure the content but based on the figures I can find on the web a general honey should contain about 200 ppm K+. In 20 L must that I intend to prepare the concentration becomes 53 ppm. Hence, I just need about 250 ppm to reach the 300 ppm needed.

I prepared a quite extensive spread sheet but in short the additions are as follows

day 1: 47 ppm N and 28 ppm K+
day 2: 64 ppm N and 57 ppm K+
day 3: 64 ppm N and 57 ppm K+
day 4: 64 ppm N and 57 ppm K+
day 5: 57 ppm N and 57 ppm K+
Total: ~300 ppm N and ~250 ppm K+

Or put in another way:

Total Fermaid K: 10g
Total MAP: 19 g
Total MAC: 13 g
Total pot ash: 9 g
i.e. total additions: 51 g

Everything added each day was weighed into 5 tubes (various amounts of Fermaid K, MAP, and MAC) and the tubes were labeled 1-5 so that it would be easy just to add one tube every day for 5 days


Finally I also prepared for an 800 ml starter with 33 ppm of N from Fermaid K only. Now I am ready to go.

I wonder if it is possible to add an Excel sheet to this blog for easy access...... Anyone?


...... and what to do with the abdicating queen.

When taking the old queen out I was wondering what I should do with her. I could not really get myself to just kill her and through her out, so I decided I would try to dry and exhibit her.

First I needed to kill her in a gentle way. I did not have any organic solvents at home so I just figured I would get her drunk in Bacardi :o). I put her in a glass with some beads to lift her from the Bacardi rum in bottom. It took longer than I expected and she was not dead until the next morning.


When I took out the queen she was damp and a bit curled up. The wing was sticking together so I needed to dry her in the position I wanted to exhibit her. A cork, a few pins and some precision work did the job - a pin in the neck, on each side of the body and positioning the legs and wings in a "natural" position.


Hereafter I just left her on a shelf to dry. Also, I did not have a plate to pin her to. I found a good frame in IKEA where the glass was lifted several centimeters from the picture. I found a piece of styrofoam about 1 cm thick and cut out a square which I then covered with a yellow dish washing cloth. This I could use as the surface to pin the queen too. I picked a yellow cloth because the contrast to the dark queen highlighted her details.

And voila!


Wednesday 22 October 2014

New queen in the castle

Back to my bee hive....

After the formic acid treatment in september I had decided to change the queen in the hive. She is marked yellow which means that she from 2012. Last year the hive behaved great, but this year she had several times started to make swarm cells, i.e. cells for new queens.


If these are not removed, half the hive will swarm with either queen to a new location - typically a tree close by. This happened several time in "school hives" of the bee association that I am member of and it is quite an awesome thing to see - and to take down again.


The new queen bee that I bought is from this year 2014 and is labeled with a green mark.


 Changing queen is remarkably simple.

1. Remove the old queen and leave the hive without queen for a day. I caught one extra working bee with her which I could not get rid of.


2. Add the new queen in a place where the other bees cannot get to her and sting her to death. Leave the hive for half a day for the bees to get use to her pheromones.


3. Insert the new queen in the hive and let the bees work for her by digging her out and feeding her.


And the hive now has a new "monarch". Can you find her........ :o)


Tuesday 21 October 2014

2014 batch 1: Cyser (4) Malolactic fermentation

Fermentation is over and the mead has been racked twice during the last 3 weeks.

The taste of the mead is pleasant but it still has a sting to it from the malic acid. For that purpose I had purchased Malolactic bacteria from White Labs (WLP 675). It is a suspension that must be kept refrigerated until use. I found instructions (HERE) where it stated that there should be about 5 Brix of residual sugar which corresponds to a gravity of 1.020. Secondly the bacteria can be propagated in apple juice (or tomato juice). Finally the bacteria has high tolerance for low pH (pH 3.0) and an optimal performance at approximately pH 4.0. The tolerance to alcohol is up to 15%. Working temperature is 21-23oC

So the conditions in my Cyser are close to PERFECT :o)

I took out the vial from the fridge 4 hours before use, shaking it periodically and then added the entire vial to the fermenter. The following day I got a few bubbles from the airlock, so the bacteria is already hard at work.


The flask to the right contains a small sample of the mead so that I can do taste tests as the malolactic fermentation progresses. I will also try to set up a TLC measurement to get a semi quantitative measurement of the progress - more on that later...


2014 batch 1: Cyser (3) Possible nutrient deficiency

My fermentation did not exactly finalize as I had hoped/expected. The rate of bubbling in the airlock just kept slowing down over a much longer period than I anticipated.

I tried to make plot of the fermentation events. I assumed that the amount of CO2 produced is proportional to the conversion going on and also proportional to the rate of bubbles from the airlock. Short time intervals corresponds to fast fermentation, so in inverted the time between bubbles and put it in % of the fastest bubble rate. For gravity I expected a drop of 0.107, so I calculated the gravity drop in percent of the expected maximum loss in gravity.

Then the plot look like this:

It is clear that after 5 days the fermentation slows day quite dramatically but it does not come to a halt immediately. Interestingly only half of the "fermentable gravity" has been used at this point. I assume that some sort of deficiency sets in - either free ammonium or potassium. The apple pulp was gone and only a clear precipitate of yeast was visible through the fermentation bucket. The liquid is about as clear as milk, so I still assume that there are plenty of amino acids available.

The mead was moved to a new fermentation bucket after 14 days to remove the bottom layer of yeast and this was repeated one week after when even more yeast had precipitated out. 

In regards to gravity I started out with an OG of 1.116 and when the fermentation stopped the gravity was 1.018, ie. a drop of 0.098. This corresponds to an ABV of about 13% using the quick formula: 
(OG-FG)/0.0075.

The fermentation started with a pH of 3.21 of the must. Now after the fermentation the pH is 3.60. This is quite good since the pH of the final mead should ideally be around 3.8. So almost there.....


Sunday 5 October 2014

2014 batch 1: Cyser (2)

It is Sunday evening, and it is exactly 1 week ago that I added the yeast to the cyser. Now the gravity was measured to 1.044. It started at OG = 1.116, so it has already dropped 0.072.

Last year I learned from experience that fermenting to 14% ABV lowers the gravity by something pretty close to 0.100. The sweet mead yeast has a max ABV of 15% so under optimum fermentation conditions the gravity should drop about 0.107. In that case my FG should end up at about 1.009, which means that I am 0.035 from my target FG or that the fermentation has progressed 2/3 in just one week :o)

I noticed that the time between bubbles in the airlock initially was about 2 sec. Now this time has increased to about 5 sec, so the the fermentation appears to be slowing down a little.

I am hoping that the fermentation will stop abruptly during just one day. That will be indicative of good fermentation conditions until the ABV ceiling is reached. Then we will see how close my estimates will be to the actual values........

Friday 3 October 2014

How to make a cheap and functional magnetic stirrer

In my post about this years cyser I killed my started using an old discarded magnetic stirrer, because it heated up after i had been running half a day and thereby heated my starter and knocked out the yeast. Buying a magnetic stirrer is ridiculously expensive, so I have been looking for alternatives.

I had been working on my own home made magnetic stirrer, and even though it was not quite finished and fancy looking, it was still working. I got the idea from reading www.instructables.com where I found complete instruction on how to make a magnetic stirrer (HERE). I am no wiz with electronics but this was so easy that even I could do it :o)

Getting an old computer fan is not that difficult these days since nobody wants stationary PC's which are though out all the time. Ask around and somebody will probably have PC just collecting dust and will be happy to let you through their old PC out. Just open the PC, unscrew the fan, and rib the wires out of the motherboard. Clean the fan with wet paper towels, and you now have the main ingredient.

Then you need 2 small power magnets (or neodymium magnets). I purchased mine over the net and it was quite cheap. They were 2 mm wide and 8 mm in diameter. I bought 4 just in case......

These have to be glued on to the fan opposite of each other but also with opposite polarity pointing upwards. Use super glue for the job (cyanoacrylate glue), since this is fast drying and very persistent. But you have to do it right first time.

Finally you need some wires, battery pack, on/off switch (optional), and some sort of connectors.


This is pretty much the same set-up as I found on the web. But there are a few things that are not mentioned there, but are equally important. First of all I was not able to get a cheap potentiometer so I could turn the speed up and down. Instead I just used "number of batteries" to control the speed. I quickly found that:

2 batteries - not enough power to turn the fan
3 batteries - OK speed
4 batteries - Fan is spinning way to fast

..... so I only use 3 batteries (and a clip to make up for the forth in my battery pack)

I used purchased teflon coated magnets as stirrer bars, and the magnet inside them are not as strong and the power magnets. If the stirrer magnet is too long, it cannot keep up with the fan due to water resistance. Hence the magnet size need to be matched with the battery size and speed of the fan.


The two smallest magnets work but the largest does not. Size does matter :o)

One thing I found quite interesting was that electronics and Lego use the same scale. I was surprised to find that Lego matches the screw holes of the fan so I gave my boy Julius an ice-cream in exchange for a "few" building blocks. He wasn't so sure that he came out on top in this deal.

So using 4 antennas as pins I could easily slide the fan down on these, and lock the fan in place with the more Legos. I also put some blocks in the corners so my beaker would not slide off.


And there you go - a cheap and functional magnetic stirrer.